I got a few new goodies today from Simon Says Stamp, including a few of their new exclusive stamp/die sets, and this fun stamp. So many thoughts running through my mind for this one!
I've been really liking all the "ombre" stuff I've been seeing over on Pinterest. I love the soothing way the colors blend into each other. And what does ombre mean anyway? Anyone know?


Pretty!
Naturally, the Gradation stamp really got me excited to play with my own ombre, eh hombre?
So here's my card:
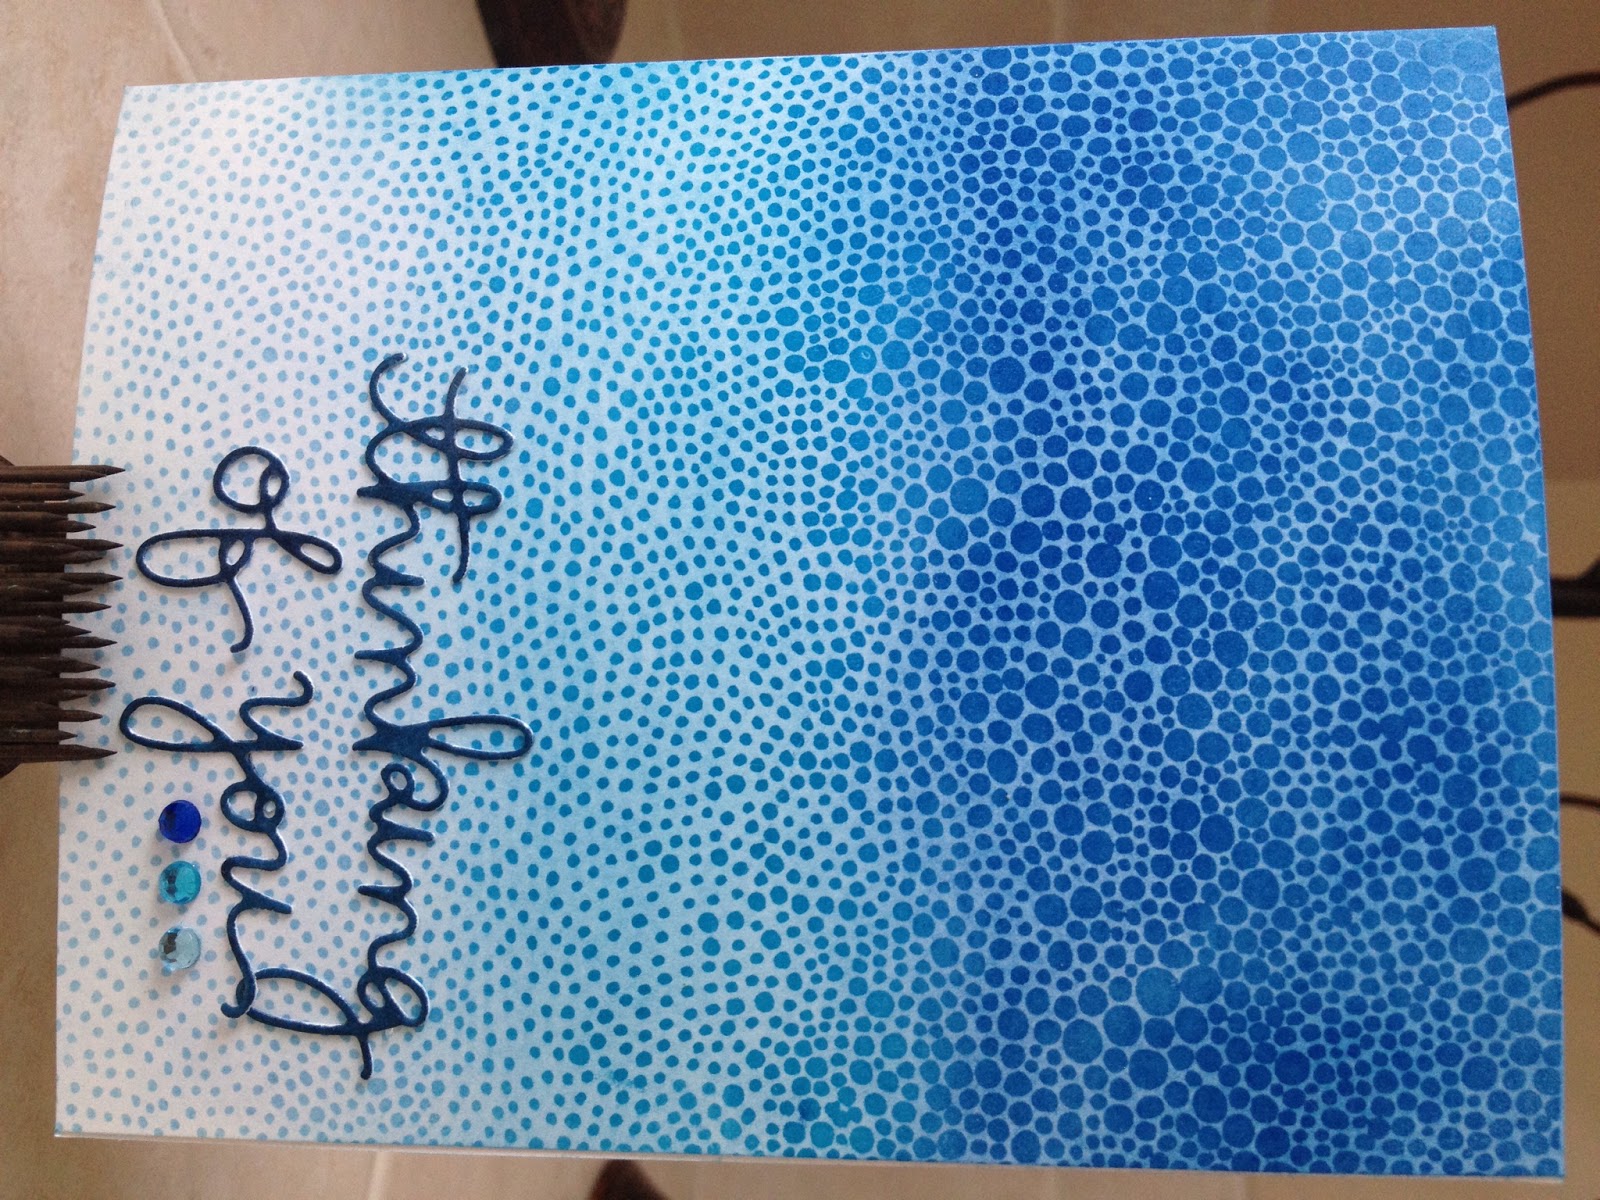
I broke out an old technique I haven't used in years: VersaMark and chalks!
The vast majority of my comments on my last post - in fact, every comment was *begging* for step-by-step instructions, so I thought I'd add some on this post! (thanks, Karen ;) )
I started by inking up my stamp really well with VeraMark ink. VersaMark is a clear ink that's very "sticky", and dries very slowly. It's great for heat embossing, but for this project, I just wanted the ink to stay wet while I work with the chalks.

I then put the folded card onto the stamp, rather than putting the stamp onto the paper. With a stamp this large, it's sometimes easier to do this. You just have to be sure to press the entire card onto the stamp - rubbing your fingers to the edges all around.

It's a little difficult to see, but the VarsaMark ink leaves a pale watermark on the paper.

I start applying the chalk. Beginning with the lightest shade of blue and using a cotton ball I gently rubbed the color onto the card. After I got the color I was happy with, I blended the medium blue and finished with the darkest shade of blue.

I then set the card base aside and started to work on the sentiment. I was super excited to play with this die. These wafer-thin dies are so great. Quick and easy to use and they do a great job. I used a little washi paper tape to hold the die on place.

I ran the die and a small piece of Neenah Solar White card stock through my Cuttlebug, and...

Voila!

The pieces just push right out! I used a needle to push the center of the loopy letters out.
I wanted the sentiment to pop off the page a little, so I colored it with a Distress Ink marker in Faded Jeans.

Since these pieces are pretty thin, I wanted to be careful when adhering them that the adhesive didn't show. I used tiny dots of Glossy Accents and it did a great job.

A few coordinated gems, and there you have it!

I hope you enjoyed walking through this with me - Thanks for stopping by!
I'm in awe!! All those new terms!!! VersaMark, heat embossing, wafer-thin dies, washi paper tape, Neenah Solar White, Cuttlebug, Distress Ink, Glossy Accents! You can tell I've never made a card in my life! (Well, I did attend one stampin' up party and made a few Valentine's Day cards - eons ago).
ReplyDeleteThanks for the tutorial. I'm headed out to buy my supplies!!! (maybe next month!) :)